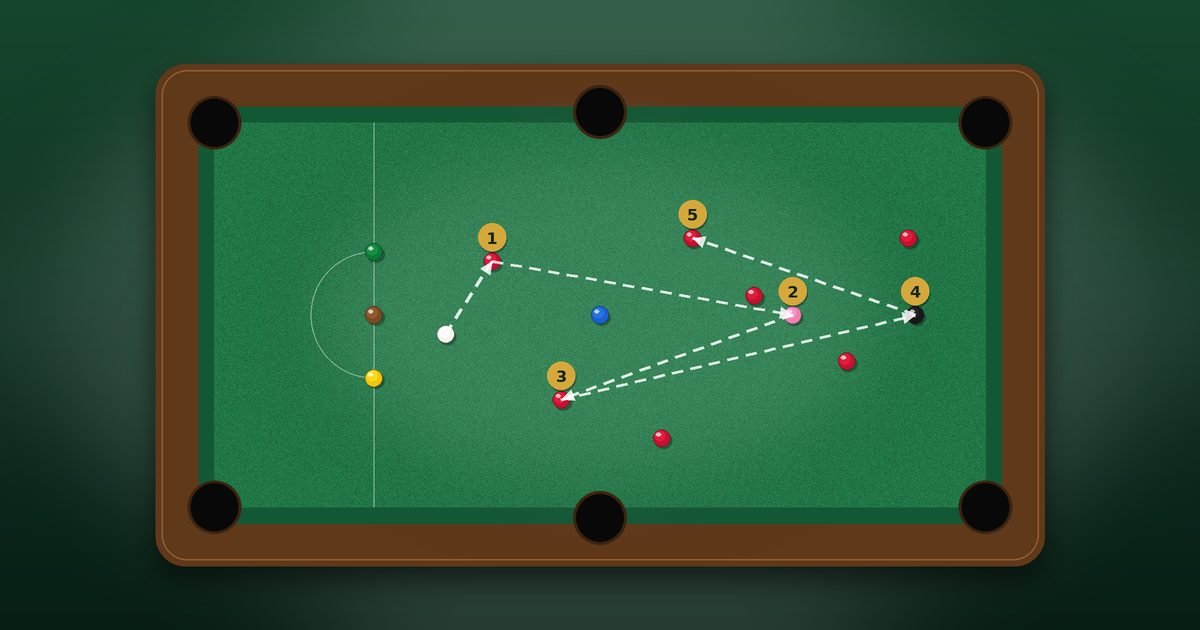
Every frame of snooker is decided by breaks, the runs of scoring shots a player makes in a single visit to the table. A century break gets the headlines, but the real skill is the same at every level: pot a ball, leave the cue ball in a good place for the next one, and repeat. This guide explains how breaks are built, what to think about before each shot, how to open the pack of reds, how to plot the colours, and how to practise so that your breaks get longer.
What is a break?
A break is the total scored by one player in one visit to the table, before they miss a pot or commit a foul. Because the game alternates between a red and a colour, a break is an alternating pattern: red, colour, red, colour, and so on. Every pot adds the value of the ball to the break, so the maximum possible break is 147. If you need a reminder of the numbers, our snooker ball points guide explains how a break adds up and why 147 is the ceiling.
It helps to think of a break as a chain. Each link is a pot plus a cue-ball position. If either link is weak, the chain breaks. A player who pots five balls in a row but leaves the cue ball behind a pocket jaw on the sixth has not built a break; they have had a lucky run. The aim is repeatable, controlled scoring.
Positional play: the heart of break-building
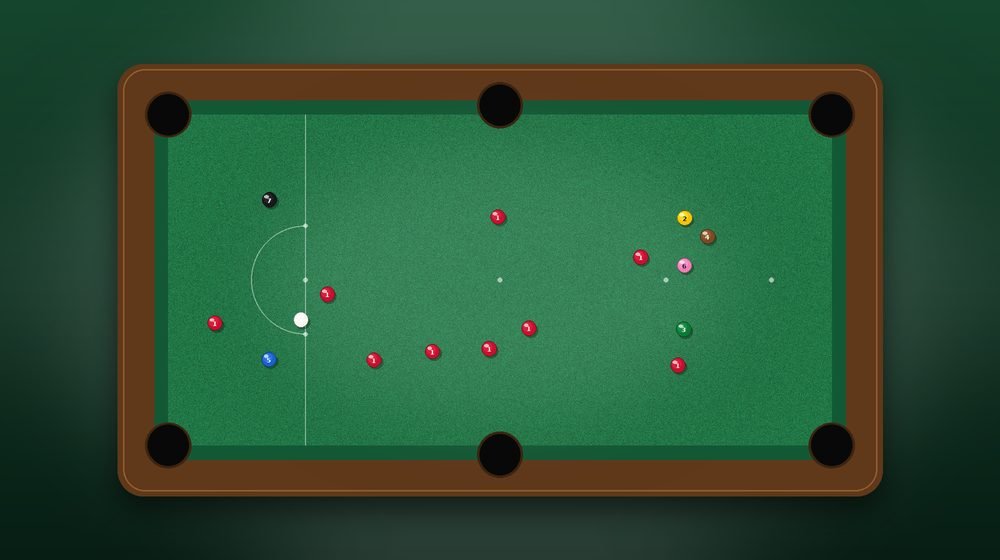
Potting a ball is half the shot. The other half is where the cue ball goes afterwards. This is called positional play or cue-ball control, and it is what separates beginners from competent players. When you pot a red, the cue ball needs to finish in a spot from which you can pot a colour comfortably. When you pot the colour, the cue ball needs to travel to the next red.
Three principles help.
- Keep the cue ball close to the object ball. The shorter the distance of the next shot, the easier it is to pot accurately.
- Aim to leave the cue ball with a straight or nearly straight pot. A straight shot is the easiest. A shot with a fine angle or from the cushion leaves much less room for error.
- Use the correct speed. A little extra speed can send the cue ball too far, and a shot that is too soft leaves it short. Learning to judge pace is a lifelong job, and our guide to aim and cue-ball control covers it in detail.
The tools for positional play are the three basic cue-ball actions: stun, which stops the cue ball dead; follow, which sends it forward after contact; and screw, which pulls it back. We look at them closely in our cue-ball spin guide.
Planning two or three shots ahead
Before each shot, ask a simple question: where do I want to be for the next ball, and what is the safest route to get there? A good break-builder looks at the whole table, not just the shot in hand.
- Choose the next ball first. Decide which red you will play after the current shot, and which colour you will aim for afterwards.
- Work out the ideal cue-ball position. From that next ball, there is usually a zone on the table where the cue ball would be perfectly placed. Think of a target area, not a precise spot.
- Select the shot that sends the cue ball there. It may involve a stun, follow or screw action, and a particular pace.
- Check the risk. If the shot is too difficult, choose an easier ball or a safer position, even if it means a less ambitious plan.
Beginners tend to plan one shot ahead, which is natural. As you improve, you will begin to plan two, then three. By the time a player is making regular breaks of fifty or sixty, they are plotting the whole sequence of reds and colours in their head.
Opening the pack of reds
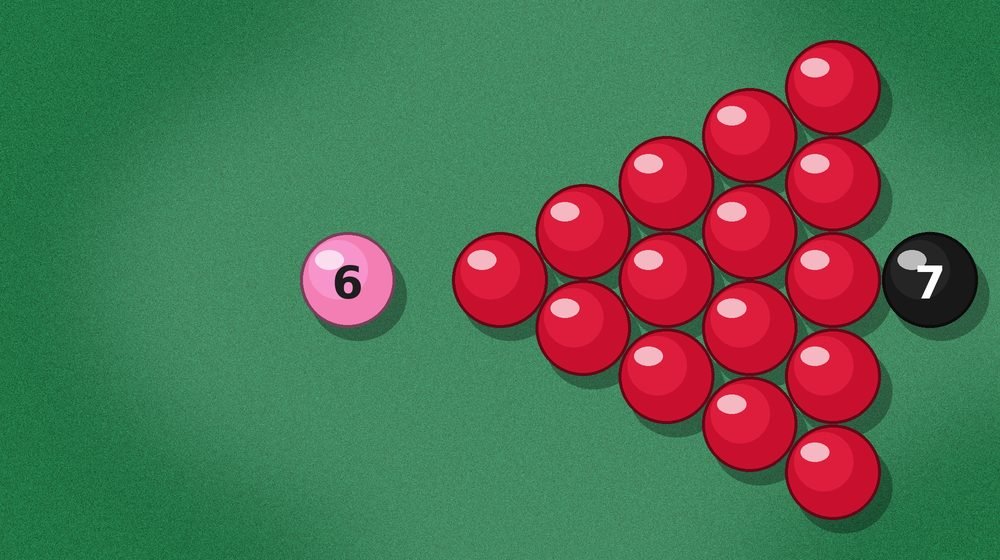
At the start of a frame, the fifteen reds are packed tightly together, so you cannot pot most of them. Break-building begins when the pack is opened and the reds are spread across the table. The first real chance to build a break usually comes after a player pots a loose red near the edge of the pack, or after a safety exchange that has loosened a few reds.
When you are given the opportunity to open the pack, think carefully before going in.
- Look for a red that can be potted while still leaving the cue ball a path to the black. The black is the most valuable colour, and the reds close to it are the most useful to open.
- Take the pack apart gradually. Hitting it too hard scatters the balls randomly, so that reds end up on cushions or in awkward places. Hitting it too softly may leave it unopened. A controlled, medium-paced shot that sends two or three reds off is usually ideal.
- Avoid breaking the pack unless you have a follow-up. If you open the pack and leave your opponent a pot, they may build the break instead. Think about what you are handing over.
Many frames at club level are decided by who opens the pack well and who does not, which is why it is such a skill. For the defensive side of this, read our guide to safety play.
Choosing and potting the colours
After each red, you may nominate any colour. Most of the time the black is the best choice because it gives the highest score, but only if you can pot it with a good chance of leaving the cue ball in a position for the next red. When the black is unavailable or risky, the pink and blue are useful alternatives. The brown, green and yellow, sitting in baulk, are lower in value but easier to reach and are often the sensible choice when the cue ball is down the table.
A good rule of thumb is to take the highest-value colour that you can pot safely and use to continue. A seven-point shot that leaves you stranded is worth less than a four-point shot that keeps the break going. The frame is long, and consistency beats flash.
After every colour you pot, remember that it will be replaced on its spot, so the table gets tidier as you go. That means the black will always be waiting on its spot, and the cue ball can return to it again and again. Many breaks are built around a “black-and-red” rhythm, in which the player pots red, then black, and returns to the pack for the next red, scoring eight points each time.
The black ball and the break
The black is the break-builder’s friend because of where it sits. It is close to the red pack, and the angle from the black spot into the top corner pockets is usually straightforward. A competent player will use the black as a staging post: pot a red, play the black to a corner pocket, return to the reds. Doing this repeatedly, with careful cue-ball position, is how most big breaks are put together.
There are two things to watch for. First, if another ball is sitting on the black’s spot, the black has to be replaced on the highest-value free spot instead, which changes the angles you were relying on. Second, when the pack is gradually spreading, the black can become blocked by reds, so you may need to switch to the pink or blue.
Clearing the colours
When the last red is potted, and you have taken a colour after it, the colours must be potted in ascending order of value: yellow, green, brown, blue, pink, black. At this stage the table is clear of reds, and the position of the cue ball for each pot is easier to plan. The colours stay in place, so the shots are predictable.
A common mistake here is to pot a colour well but leave the cue ball in the wrong place for the next. The sequence of yellow, green and brown, all on the baulk line, is a good example: the cue ball has to move sideways between each, and a poorly judged pace can leave an awkward angle. Take your time, because 27 points are available in this final sequence, and a long break often ends here.
Common break-building mistakes
- Rushing. A break builds on calm, deliberate shots. Pause before each one.
- Over-hitting the cue ball. Many missed pots follow a shot hit too hard. Smooth, controlled speed is more reliable than power.
- Ignoring the next shot. A perfectly potted ball is wasted if the cue ball ends up behind another ball or on a cushion.
- Playing the colour you want instead of the colour you can reach. Choose pragmatically.
- Not looking after the pack. If you scatter the reds with a careless shot, you may run out of easy pots.
How to practise
The best way to learn break-building is to practise it directly. A simple drill is to scatter the reds around the table, then try to clear them in sequence, alternating with the black. Count your score, then try to beat it. A second drill is to place a red and the black in set positions, and practise potting the red and sending the cue ball to the black until you can do so reliably. Our guide to snooker practice drills contains further exercises. If you want to try these ideas straight away, load the game on our home page and play a frame against a friend or in practice mode.
Breaks do not come from luck. They come from a good stance, a straight cue, a calm mind and attention to the shot after the next one. Build those, and the numbers will take care of themselves.